Translate

Tuesday, July 19, 2016

More hand-lettered envelopes and water-coloring on cards!


For those of you that do not see me on Facebook, here are a few more envelopes I did using the style of Devoted Diarist.  Her style and technique is way more advanced, but I keep trying!  
 This one is for my stepson and his now 1 year bride, for their first wedding anniversary!
 Two cards I made using watercolor and Sharpie for drawing.  I learned this technique from The 11th Apartment, who you can find on Blogger and Facebook.  These were done using cardstock, NOT watercolor paper, so Sharpie was fine once the watercolor was dry.  If using watercolor paper, evidently Sharpie will bleed, so you must use a permanent artist pen, like PITT.
I just bought REAL watercolor paper, and artist pen, so I am ready for action!  I also bought the 36 color pallet of Artist Loft watercolors.  I am making some swatches to check out all of the colors later today. Wish me luck!  Oh, and I have been writng to a friend in French, and found that watercolor in French is aquarelles....so pretty!!!

XOXO_ Julie

Monday, July 4, 2016

Happy 4th of July, and some other goodies!


Hello everybody!  I added some photos here of interest to me, and maybe you as well.  I have learned this pretty way of addressing envelopes to mail, from an Instagrammer, called Devoted Diarist.  She has a different sort of lettering on hers, but really, you can use your own normal handwriting, just making it larger, and colorful, and adding more element on the envelope.  I use pretty stamps, and a star rubber stamp and added stars all over for an Independence Day feel.
 This cute lamp was hanging from the ceiling in a super amazing donut shop (where I only had an iced coffee, BTW, since I am following a low carb diet these days).  It is called Rhino Donuts in Boca Raton, Florida.  They have the most unique, and amazing looking donuts I've ever seen.  Isn't this lamp shade just so cute???  I kind of just want one over my dining room table, honestly!
 Doozey having just given me a high five!  She sends her love to all doggies out there!!!
 Carla asked if I had made just those grocery store place mat travelers journals from my last post, and I have also just made two more in the small field notes size, out of leather.  The one with a lime green stretchy cord is mine, and the one with tan cord I made for my brother to use at work.  He was previously using a small notebook with a coil binding, but it was hard to slide it on and out of his pant pocket.  So far he has reported liking the one I made.  YAY!  I really enjoy making travelers journals, and plan to make one more for my sister and sister-in-law.

This one is mine:

 This is the tan cord that went to my brother:
Hope everyone has or had a nice Fourth of July.  We are going to my sons house, and the fireworks go off right across the waterway.  It will be fun to spend time with all 4 grandkids.

XOXO!  Julie

Friday, April 22, 2016


Hello to anyone who happens to come by!!!
How do you like this solidly CHROME Mercedes I saw today!  WOW!  I'm not sure I would want to see my reflection THAT MUCH!!!  It could be like a fun mirror tho, depending where you stood!  LOL.
 On my walk yesterday we encountered this Mamma and her babies!  So sweet!  The weather has been so nice lately...very sunny, warm, but cool in the shade, and breezy.  It kinda feels like what heaven might be like!
 Saw this poster on another of my walks yesterday.  It is a swing/hanging seat available at Pier 1.  I just think it is so cute, but I would have to hang it inside as it would get covered in mildew here in south Florida, or rot in the humidity, I think.  I sure wouldn't want to chance it!
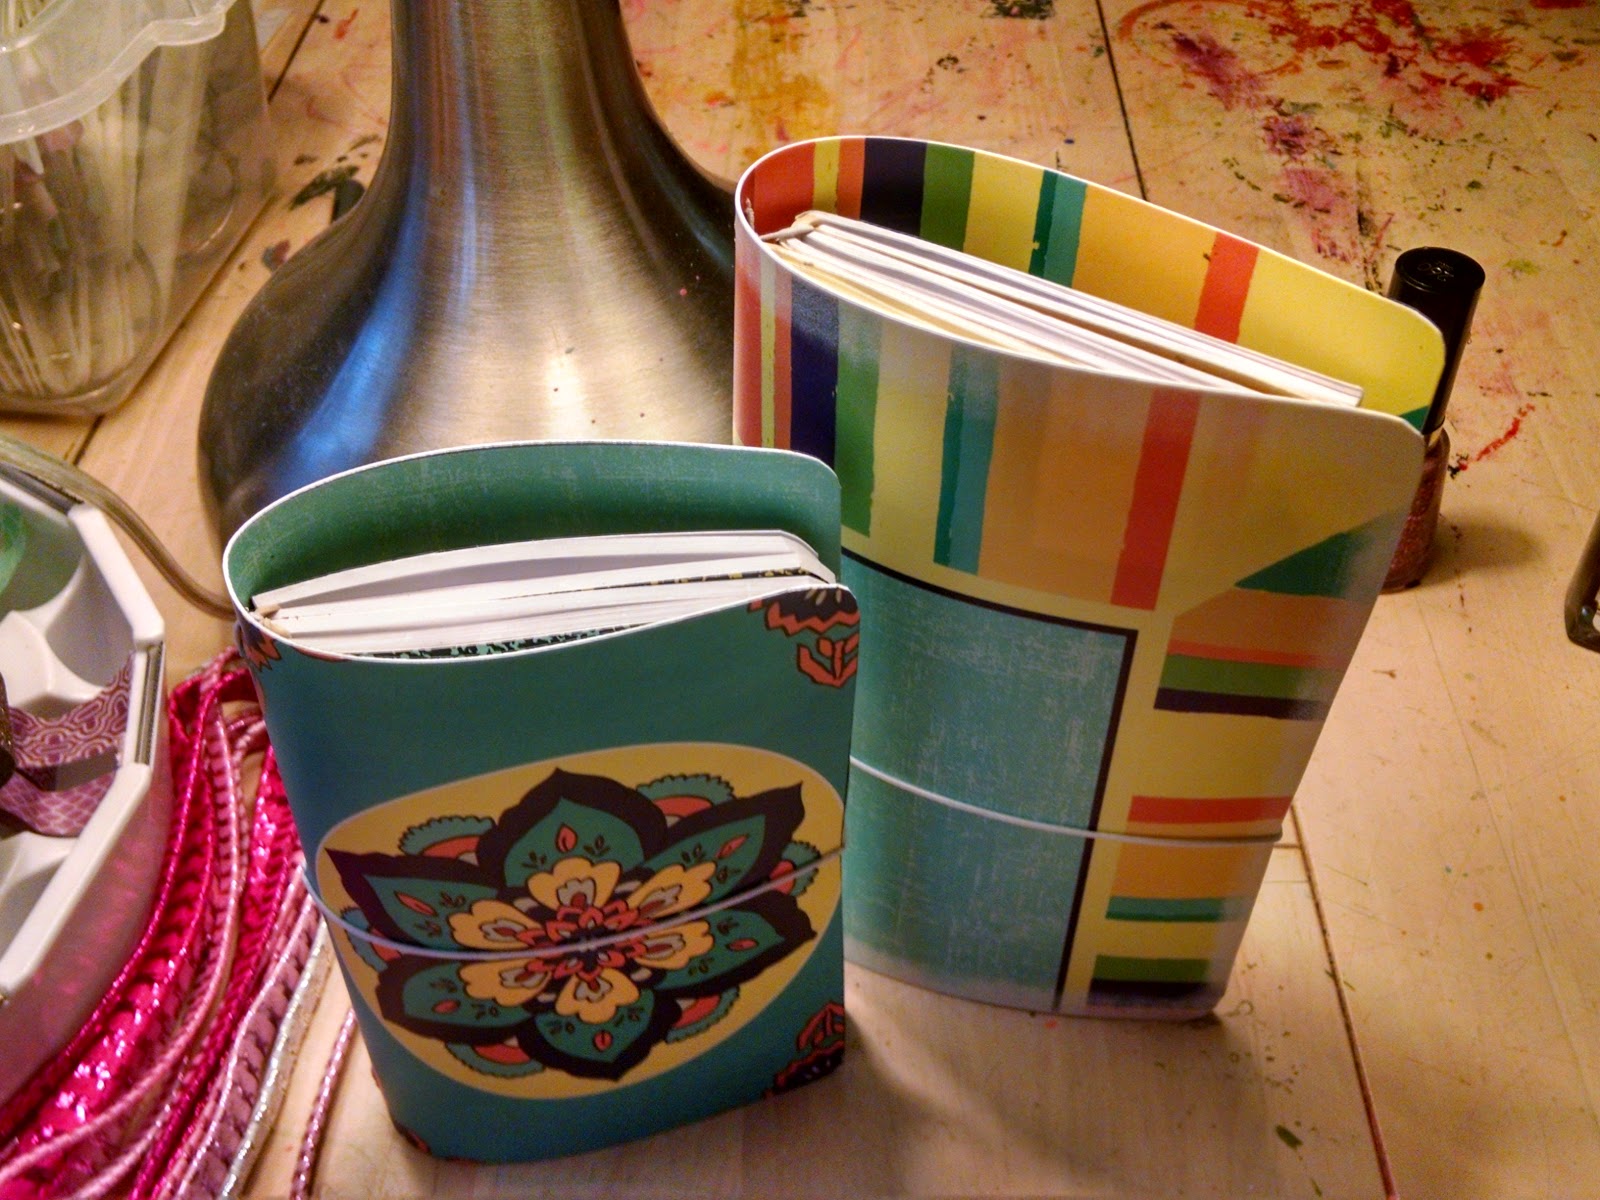
Here are two travelers notebooks I made out of plastic place mats from the grocery store!  Have you seen the travelers notebooks?  They are so fun, as you insert different types of booklets inside, and they can include things like calendars, planner sheets, expense tracking sheets, coloring book sheets, diet and exercise, etc.  I have gotten involved with a few groups on Facebook, and love seeing what people are making, buying, and selling.  

 Most of them are made of various colors of leather, but some are faux leather, and fabric,
There are elastic cords running up and down inside the spine to slip your inserts into.
                                                            The little one is so adorable!
I am currently trying to make my brother a dark brown leather one, so will let you see it when I'm done.  Waiting for my 2mm elastic cording to get here from Hong Kong!
Here is a pretty cutting from my geranium.  
 And here is a pretty picture of my male Betta after seeing the female...he flares out his fins and tail, and looks so gorgeous for her!  Normally they don't see each other, because it wears him out, and he starts loosing parts of his tail and fins!
 These are just some random photos from my past few weeks.  I hope anyone reading this is doing well.  I miss you, my blogger peeps! Take care!  XOXO!  Julie

Friday, February 12, 2016

OK, I caved and sewed myself a cover!

After searching literally hours for a pretty handmade journal cover, I discover the perfect one!  I went to order it, but the difference between the dollar and whatever country it was in, it ended up costing too much. Still I thought I would order it.  Then suddenly I said to myself, "What the ???  is your problem, Julie"!!!  I have so much scrap fabric!!!!  I had to convince myself I could do it!  I jumped up, started measuring my journal, calculating, and picking out fabrics to coordinate.  This floral pink, white and black is flocked, and it was a blouse, that had pin tucking on front.  I decided my journal needed some interesting architectural details, so the pintucking would be on front.  The spine is a natural muslin, and the black jean material is a pocket.

The back.  The black jean material continues around the spine, and across the whole back, which can hold papers, or pens, paperclips, etc.
 The inside is entirely made of the beautiful floral material. If the book were removed you could see it.  I made flaps, so that the cover can be used on any A5 journal.
 I like how it turned out, with the use of the different textures of fabrics, and you know that pocket makes me very happy.  The pen I painted with nail polish goes with it perfectly!

This project was a bit scary for me, but I'm so glad I tried it!!
XOXO- Julie


Thursday, February 11, 2016

Making a special journal

Hi everyone!  I just learned about bullet journals.  Have you ever seen or heard of this idea? Basically you just make a sort of list of whatever type you wish...it can be many things, such as THINGS TO DO, tracking things you have done, or recipes, DIY's, etc.  There are videos on You Tube to learn about this system.

Anyway, I was searching around the house for a notebook that I could do this with, and found an 8.25 x 5.5 basic paper bound notebook, that has graph paper inside.  I thought this could work OK for list making.

This journal will list all of the Korean dramas I have watched, by year and month.  I do love my dramas!  I got an idea to attach a monthly calendar page inside the front left side when I get up to a new month starting.  The person who did this, just uses pretty washy tapes to tape it in.  (The calendar is smaller than the page so there is room for the tape).  Here is her blog post about it.
******ZOOT BLOG******

This notebook had some spine issues, so I used E6000 to repair, and then used some of my homemade decorative tape to cover the old ugly black spine.  It is improved already, but I am wondering how I can decorate the front, and that is where I am looking for any ideas.  I can sew a lovely cover for it too, and maybe I will end up doing that anyway, but just wondered if there would be another way...

Here is a picture of my cute baby, Doozey, being all snuggly this morning, too.  Just for you!  See the shaved area on her arm where she had an IV in the pet hospital this past weekend?  Shes doing much better.  Still on antibiotics (2), and a probiotic,  A few more days to go, and she should be good as gold.  My poor sugar baby!  
xoxo- Julie


Monday, February 1, 2016

Well, hello again!

I wanted to pop in to show the washi tapes I have made so far.  These were my first tries, and far from perfection, but I am getting it down to a better look with time!  First though, is a wonderful pen I have that had a white barrel, (and drug name on the side).  It writes like a dream, but I wished it was prettier!  I saw where you can use mail polish to paint your pen, so I did a random dabbing kind of deal, and ended up with this!  Pink, gold, and lilac.  I really like it.
 So here are the thicker 1 inch washi tapes I made using "Cloth " tape from drugstore.  I liked this at first, but then graduated to the 1/2 inch PAPER tape (also from drugstore).  It tears more like actual washi tape, and has that same kind of feel.  I just realized I spelled your name wrong on this tape I made Bobbie Lynn!!!  So sorry! What a dummy!  Well, as I said I am learning, and I think I was a bit excited at my first tries!!!  Out of these the blue with flowers stamped turned out the best.
 I like the pink with suns too!  The purple one is kinda neat also.  These all have a shimmer, because I sprayed them all with a metallic alcohol ink.

 I decided that a yellow tape with suns was a more appropriate use of a sun stamp!  The light blue tape is stamped with a green ink in flowers.  I like the random prints best.
 How do you like this huge box of decorative tapes I found at Target.  Each one is 9 ft. long.  It only cost $9.99
 Here is my carousel of washi tapes...can you see the ones I made wrapped around a plastic straw???  Love this storage idea!
 My little book I write down what I eat in.  I decorate it a bit with tapes and stickers too.  A relaxing thing in the morning.
 Here is another washi tape made with 1/2 inch paper tape.  It is hand stamped with individual letters.  Tedious, and not anything I would want to do much of. I added strips of dotty pink on each edge, but have since removed it because it looked to sloppy.

 Picture of my well worn craft table.  Love it so much, can never part with it.  You can see the grands have splashed paint on the lamp...not only the base, but shade too!  How fun!  We don't play around here, we are serious crafters!!!  Hehe.
XOXO-----Julie

Monday, January 25, 2016

DIY Washi Tape

Anyone who loves washi tape will love this video!  I will make some very soon!  Can't wait!  I already have EVERYTHING needed!  How lucky is that?  Enjoy!!!!!


Tuesday, January 19, 2016


 Hello to anyone who might still read my blog!!!  I have posted these photos on FB, and Instagram as they happened, so this is just a wrap-up of my last few days.  I have started keeping a planner, which I don't really use for appointments, but just to record anything that strikes my fancy.  I learned about it from my DIL,and the fun part is all of the planner decorating you do. It reminds me of the junk journals we all used to do, but with the new twist of having it be a planner!  I made my own "dashboard", or what they call the first page of your planner.  I added an envelope to hold decorative elements, which can be stickers, sticky notes, etc.  I cut out some parts of my actual bag of Gummy Bears, and glued them in using E6000, and sparkly washi tape. 
 Then I got to making some decorated jumbo paperclips, using ribbons, and other items, and again using E6000 to glue embellishments securely.  I learned how to wrap the ribbon around the front edge of the pape9rclip, bring the ends to the back and pull through and up.  It makes it look good and the ribbons then stick up much straighter.
 These are some of my creations.  The lighting was so bad at night.  I apologize.  You can kinda get the idea tho.
 My planner is spural bound, so I figured out how to make some cute tags that can be stuck into the binding, to add special reminders, sayings, or events.  I hand punched and cut these edges to fit.  I reinforced them with clear tape, to prevent ripping.
 More paperclips.  This cream colored flower one is reversible!


 Here is the Black Pearl Boba Tea shop, at the Wellington Mall, in Wellington, Florida we like to visit.  I had a cranberry, blueberries and strawberries, all fresh, with no sweeteners or added sugar.  I added black pearl honey boba.  It was so good.
 Here I am one morning with my chichi pillow, Doozey.  It's been cold here, and she and I have appreciated our snuggly times!!!
 We got to visit a fantastic fresh, organic, locally sourced foods restaurant, called Farmers Table in Boca Raton, Florida.  My SIL, Lynn, told me about it, so I must give her a big thank you!!!!  It is inside the Wyndham Hotel. This place is just moderately priced, but the food, and ambiance there is devine!  They have a great venue, too, for parties and very cozy events.  I imagine a nice intimate wedding reception there.  If you ever go, check out that space!  Here is a pic of my Buddha Bowl.  It was incredible.
 Dessert was a many layered cake called Opera Cake.  The ganache layer was the thing that took it right over the top!!!!!  It had a bit of vanilla ice cream on the side.  We all shared it.
 Daughter ordered a fresh chilled coconut, drilled to order!!!!!  They sat it into a wooden holder, and what a treat!!!!
Anyway, there you go.  Hope everyone reading this is well. Lo e you, and miss you!  XOXO-Julie