Showing posts with label beads. Show all posts
Showing posts with label beads. Show all posts
Tuesday, November 16, 2010
If anyone wants to see...
my paper bead Christmas tree earrings, you can find them here, on my other blog, Let It Beads! I made the christmas tree beads over the last few days, and finally got the rest of the supplies today and strung them together. FUN. Now I'll be making about 6 more pairs for Thanksgiving surprises for friends and family! :)
Wednesday, September 8, 2010
Continuing on with bead projects!
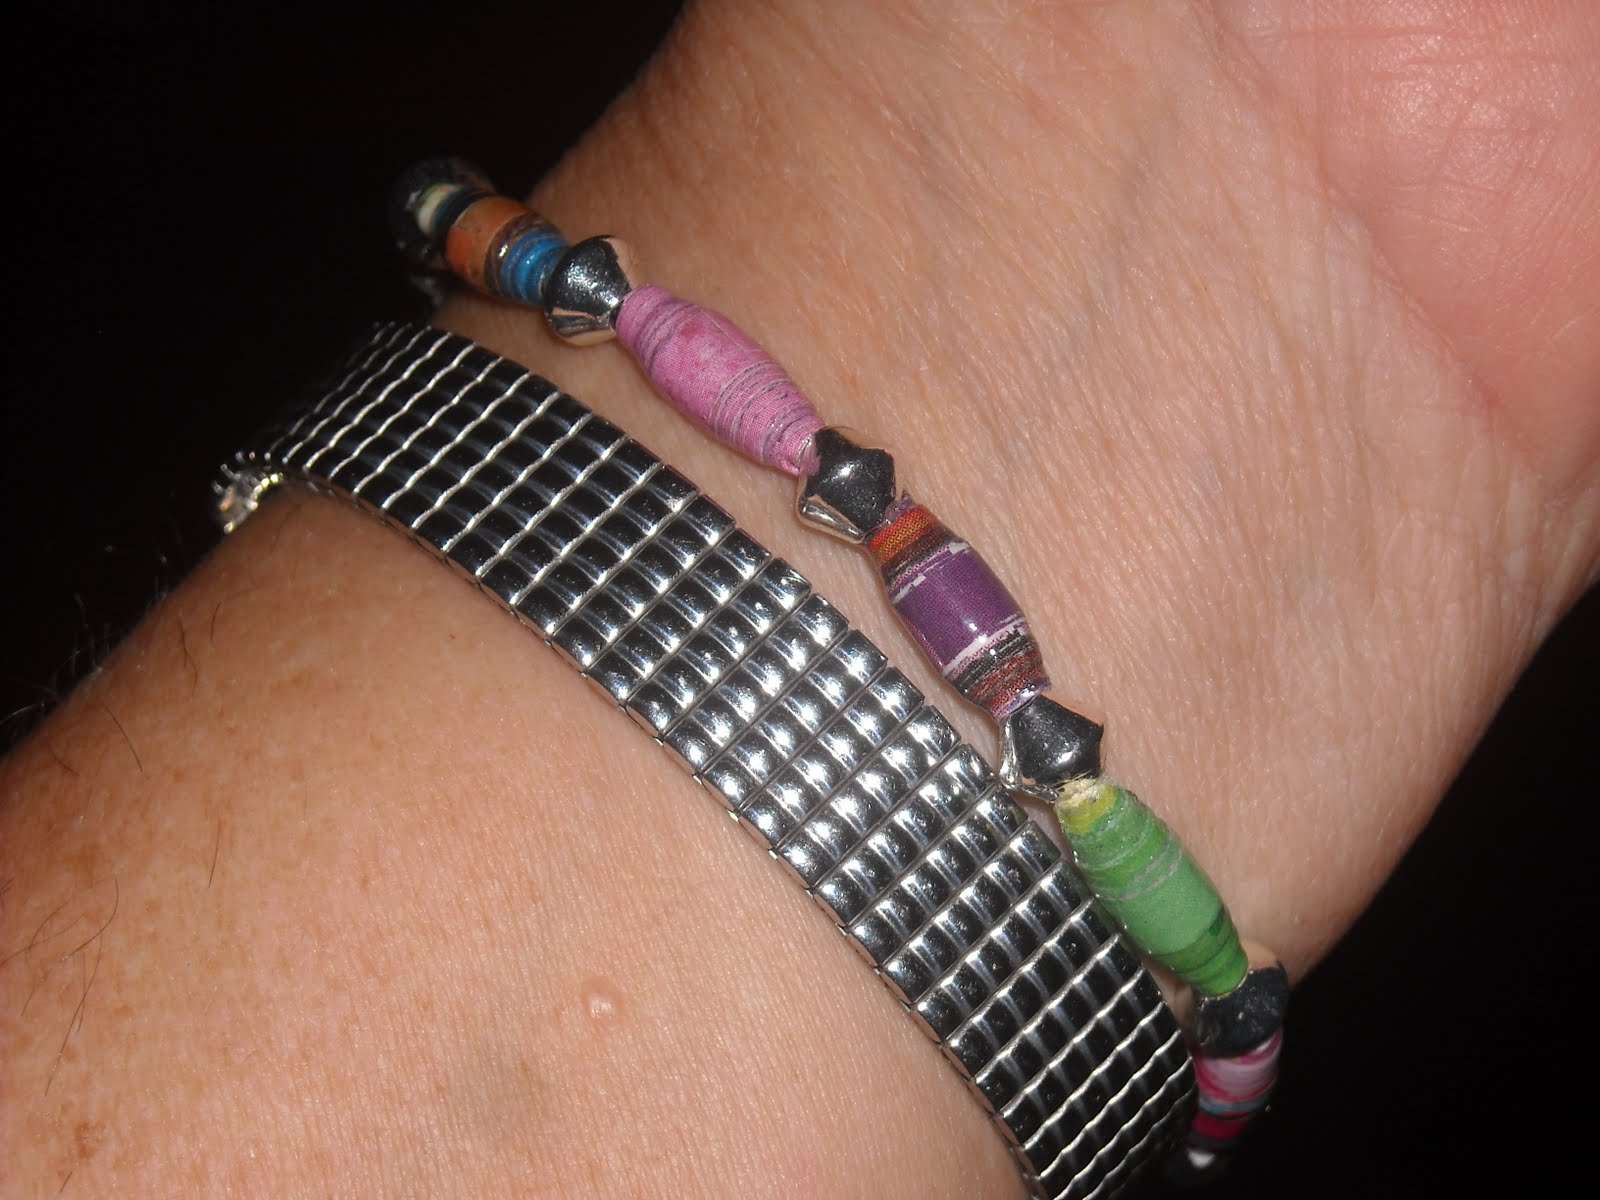
Now that my aphids are all dead and gone, I can concentrate on beads once again! Tonight my hubby got home from work and handed me a little package. It was from the gal in his office I had sent a variety of 10 beads to, so she could make jewelry. Well, lo and behold, she sent them back to me as a bracelet, so I could show what I had made! She put them on a stretchy band and put little silver spacers in between each bead! I LOVE IT!!!


I really like that it has a lot of different colors in it, and I feel I may just wear it till it wears out. I will put it right here on the blog so I will know if the beads show any deterioration or just fall apart (I hope never)!!! Anyway, she also asked me to make her beads!!! I tell you, I am enjoying it so much, I may do it just for the cost of the varnish!
Here are 20 little bitty ones I made for her tonight! I am putting 3 coats of glossy clear fingernail polish on them and that seems to be just enough shine. These measure about 3/8th of an inch in length. You can't really tell it here, but these were made from one single page from a magazine that has a dark cranberry, brown and black as it's primary colors and they look very rich, and also sort of gothic to me. Modern and sleek.

Now here are the ones I made for my sister who has been wearing a lot of lime green she says! I added the little clear cut beads in between, and am looking for what will be perfect spacers for her beads, still. These are just there for the pictures. Anyway, my Mom has agreed to do the making into a bracelet part for me (thank God)...and we are doing them on wire with a silver lobster claw clasp with a safety. I am thinking we will use Swarovsky crystals and silver for spacers to give it a real upgraded look, since she will be wearing it for her very professional job!

I have never been one to enjoy making jewelry, but this process of just making the beads, is wonderful!!! Who would have known??? Hehehe.
If you should decide to try this craft, here are a few things I have learned already:
1. Look for a page that has similar color theme throughout, and use it to cut all of the beads you can for a unified look. I did this for the lime green and the cranberry, brown and black minis above.
2. If your page has multiple colors on it, remember to cut so that the narrowest end has the color you want to see on it, as this will be your most outer layer.
3. Keep experimenting with everything, so you can find out what works best. Every time I look at a new page, I think of something to try. For example, one free advertisement that came in the mail, I noticed, has a solid black border on the edge of each page. Now, that has become my next 20 beads...they will be all black and I will make them very tiny as accent beads, and they are gonna be so great...I can already tell that I will really love them!
Hope you enjoyed seeing all my beads so far!!!
Have a good rest of the week!
Julie
Saturday, September 4, 2010
Bead making adventures, and a Fall welcoming pot!
As I had mentioned in an earlier post, I was making some beads for a blogging buddy, and I cut long triangles out of magazine pages, and rolled each strip from widest end to narrowest, on a toothpick. I glued in a few strategic places to secure it, and then I painted each bead with glossy clear fingernail polish.

I saw online somewhere the idea of putting each bead on a toothpick (good thing I had just bought a box of 800 last week)!!! Then painting with either shelllac, varnish or fingernail polish and sticking the toothpick into foam to let them dry.

I made a total of 110 beads, and when I was painting them, my husband mentioned one of his female partners at work had started making jewelry with beads. I picked out 10 different ones, for her to use in her creations, and I mailed Lynn 100. She has received them, so it is safe to show them on the blog now.

I have to say that it became addictive and I am still making more to create a few bracelets for my sister who tells me she is wearing a lot of lime green and black these days! Should be fun! I am a person who hates (and basically refuses) to ever make more than one of anything...but with this, each bead is a OOAK (one of a kind), and you never run out of interest. There are also different patterns you can cut out of the paper to make different shapes of beads as well...something I have yet to explore. Here is a basic idea of how to make them and how to cut for different shapes!

I revised this pot of previously living plants to mostly fake ones now, with a few living mixed in. I could not yet bear to part with Donovans last remaining very long stemmed pink Zinnias. I added a little scarecrow for the grands to enjoy and some fake fall leaves and flowers. Little Emily loves to tell me how cute he is, and "Niiiiiicce scrarecrow"! Hehehe. :)
Happy Sunday to you all! Julie
Subscribe to:
Posts (Atom)